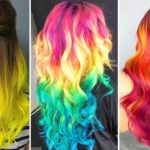
As you can see I have partially painted the hair in and I have a very rough sketch of where the hair is supposed to be it’s easy for me to imagine that the hair acts like ribbons so I try to imagine that they have this kind of quality of a flat surface and this instantly helps me to understand where the shadow and highlights will be.
I will start with blocking in the colours first and the primary shape because I have the gradation of the colour through the hair for now I will not think about the shading.
First I will apply the colour change in the hair and now I will start to think about the shadow area and highlights. The planes that are directed upward will catch the light and will be lighter in the color. And those planes that are directed downwards will be shaded.
I can hide my sketch, I don’t need it anymore. the blackout is finished and I can start adding details and just polish the surfaces.
First I just want to blend it together. And make sure that the big shapes are correct. Then I will add smaller details to it. On the end of the hair, it is important to just show a few windows of light shining through it so they will not look like a plastic block.
Don’t forget that the hair will also drop shadow on the face so the areas of the skin that are covered by hair should be darker. I would blend it as well with the background colour to give it an effect that it’s blending into the air that is surrounding her like standing in the fog. It’s all about drawing from the big shape to the smaller shape.
So from the very big mass of hair, I am slowly building up detail layer by layer by using a big brush to using a smaller and smaller brush. I’ll do a bit more polishing and add a few more strokes I think I will be done with this part.
Is not really hard to paint her as long as you think about the block out and this ribbon approach that I mentioned at the beginning. Just imagine the dimension and what direction they face is facing. This really helps to build up really good looking, realistic hairs. I hope you enjoyed this part of the tutorial. If you have any questions just leave the comment below and I wish you all a happy day. Download a free trial at www.painterartist.com.
Read More: Reliability concerns raised over pi-top’s STEM learning laptop