Hey guys, welcome to my channel. I am Maryam. In today’s video, I am going to teach you how to braid your own hair in this two Dutch braid hairstyle, which is so trendy and so popular right now. It has been worn by everyone from Kim Kardashian to her sisters, JLO back in the day to myself when I was in high school and today as well. Because it is just such a great hairstyle especially for dirty hair, especially hair that needs a haircut, especially if you want to look nice, cute and snatched honey. Remember to subscribe, comment down below, and hit the notification bell if you want to be notified of my next video. Let’s get to this tutorial. Let’s do this. My hair is already brushed out but I am going to brush it out one more time for good measure just to make sure there are no kinks.
I am going to put a little bit of this oil just on the ends of my hair. I am using the L’Oréal extraordinary oil – lustrous oil serum and I am going to list and link all the products down below for your convenience. You absolutely don’t NEED to use the oil. For me, it helps with separating the hair and it helps with braiding.
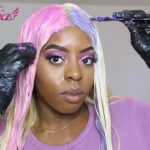
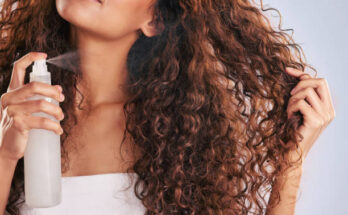
Next, I am going to create a very straight part or as straight as I can. I am going to smooth the hair to the side and them I am just going to turn over with my mirror and I am going to check whether that part is crisp and straight. One of the things I find super important when doing the two braids on yourself is to make sure that when you are working on one side, you clip away the second side as tightly as possible. So that no hair from this side would interfere with the one that you are working on. I am going to use an elastic and tie it in a little bun here and I may even clip it just to make sure that it is nice, tight and clean. The next thing that I like to do is spray some type of spray, some type of gel or like rub a pomade or something that would give me just a little bit of grip Today, I am using is ’Kérastase Spray À Porter’ flexible hold hairspray.
I am just going to rub it through my hair strands just to make sure that this top part is evenly coated. At this point, I am ready to start the braiding process. Before I even go on any further, let me point out that if you know how to braid a regular braid a three-strand braid. Then you for certain know how to Dutch braid and how to French braid. The Dutch braid and the French braid are basically the same thing, you start with three sections. For the Dutch braid, you start with the center section first, you flip it over the side and you braid it as you normally would.
Then once you get to flipping it a second time, you add a strand of hair to the section. It’s actually going to be much easier for me to show you than to tell you. I am going to take this really small section of hair right here, separate it into three strands. Take the center section and flip it over one of the sides and then you take the new center section and flip it over the other side.
The smaller the section, the closer your braid will start. As you continue to braid your hair, you will be adding new sections of hair into the three strands. I usually like to look at myself in the mirror for the front part. Once I get past my view, I just do it by feel. So for now, I am still looking into the mirror and still adding these sections in. I am just trying to concentrate on keeping this braid as straight as possible. You do not have to keep this braid close to your part like I am. If you notice Kim K’s braids go a little bit more to the side of her head but I think that is more flattering to her head and face shape.
She has a longer face shape than I do but because I am a little bit more round or square, I prefer to keep my braids at the top of my head as opposed to the side. I just find it a little bit more flattering for me personally. Whenever I am doing my hair or whenever I am concentrating on braiding, I tend to do the funniest face in the mirror. I always do this weird kissy duck-lips face and if I could try to do it right now I couldn’t possibly imitate it. It’s just my concentration face. I do not know why I do it, everybody always comments on it in all of my hair tutorials but it is not something that I can control. Moreover, it doesn’t make me a bad person, it doesn’t make me a bitch, and it doesn’t make me dumb. It is just a habit that I have and I am not sorry, it is what it is.

You gotta love me either way. I have come to the point of the braid where I can no longer see it in the mirror so I am going to turn around and finish my braid with the back of my head facing you. Here I am continuing the braid and I am doing this by feel. Separating these sections of hair with my fingernail adding them to the three strands as I am braiding along and I am trying to stay close to my part without pulling the braid too much towards my ears.
Here is where it is really helpful to have the other part of your hair away a bun, so that you are not grabbing the sections of hair that belong to the other side. Do not worry if it look a little imperfect at this point, you can always fix that later. The more imperfect it is, the more grungy and cool it looks, that’s kind of my belief. Once you get to this part, it is sometimes helpful to just bend forward a little bit. Now that we are down to the actual braid that is not connected to your head, I am going to flip back around and I am just going to finish this braid here.
I am going to use these clear elastics from ‘Goody’, the smallest size possible just to secure this braid in place. Once this braid is done, the second one is for some reason is much easier. I am going to so the exact same thing, I am going to brush out this hair, I am going to spray a little bit of gel. I am going to create three sections, starting with the center one first, flipping it over one side, flipping it back under and then adding just a little bit of hair to the sections. Now, I am going to flip my braid to the other side and I am just going to finish the process. Finally, because keeping your hands and your arms above your head is so painful. And I don’t have the most upper body strength. So for me, it’s just a bit strenuous; I am not going to lie. If you don’t work out on the regular then, you might be a little tired after this but it is really not that bad. If I can do it, you can definitely do it.
Once I am done with my two braids, I like to pull on the braid to make it more fat and even. You can do it throughout the Dutch pat of the braid and you can also do it throughout the actual loose part of the braid. This is going to give you a much more current trendy look to your braids. Some people like seeing the separated sections of the braid, I personally don’t. I just brush it back with a comb and I like to just blend them a little bit. I like to fill in my hairline. A little bit of brown shadow, this one from the ‘Tartelette’ palette. Whenever you pull your hair into a braid, it always exposes this very bald looking section. There is actually a product for this that I do not have handy right now but I will link it down below for you guys and I think it works even better than eyeshadow. Don’t feel like you have to get it, I think eyeshadow is a really great trick. I have pinned that little guy back and I have re-braided this braid a little bit.
It was just too loose for my liking. I am going to do one final thing and that is brush out my baby hairs/edges and sleek them in place. I am going to use this hourglass mascara for the brows, you absolutely do not need to use this one. You can use any brow gel or any gel but I think brow gel is a little bit better because it is meant for thicker brow hairs. I quite prefer a brow gel over a regular gel. I am basically brushing them down and sweeping them over to create this kind of style. One final touch, I am going to use this ‘L’Oréal Elnett hair spray’ – it’s got my name on it – and I am going to add a couple of spritzes to the top. Alright, maybe to the braid as well. That is it for the tutorial. I know it does not look super-duper easy but I promise you that with a couple of tries, If I can do it then you can do it and become an expert.
You can wear this hairstyle when your hair is dirty, whenever you want to look more funky and just a little bit more New York with an attitude. To me, it is the perfect hair for any occasion plus it is very current and trendy, as per the Kardashians. Hope you guys enjoyed this video. Thank you for watching and for subscribing, don’t forget to check out some of my other videos right here, I have more hair tutorials, I have more makeup tutorials. I have vlogs and get-to-know-me’s. So check them all out and I will see you guys in the next one. Muah* Love you.